How to add a SAP Monitor in Applications Manager
Last week we started off on a series of blog posts that belong to the ‘how-to’ category. The first post in that series was ‘How to add AS400 monitor’. Continuing with this series, this time we bring you the steps you need to follow to add a SAP monitor in Applications Manager.
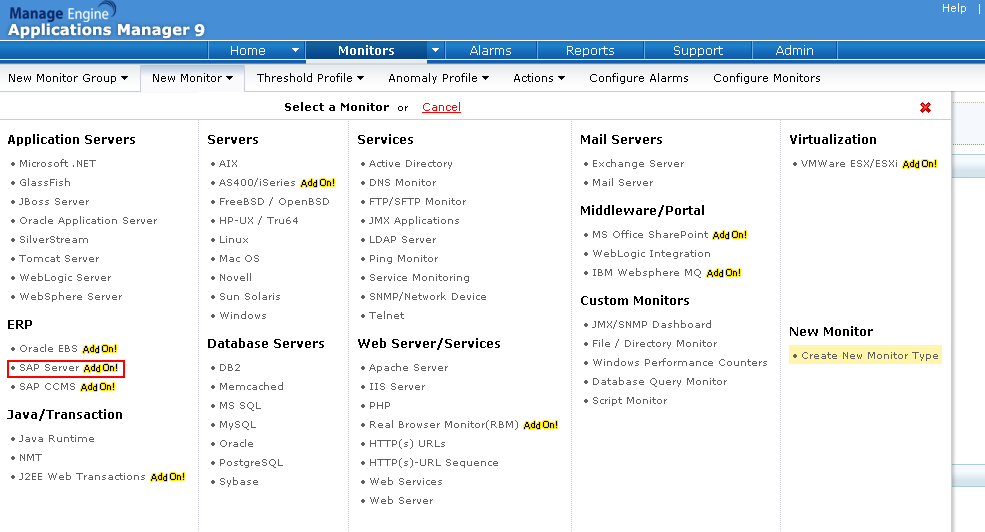
Step 1:
Click New Monitor drop-down menu and select SAP Server link under ERP category.
Step 2:
The 'Add Monitor' screen opens up. In this screen, specify the following details:

Once you’ve entered the necessary information, click the Add Monitor(s) button. This action triggers discovery of SAP servers from the network and starts monitoring them.
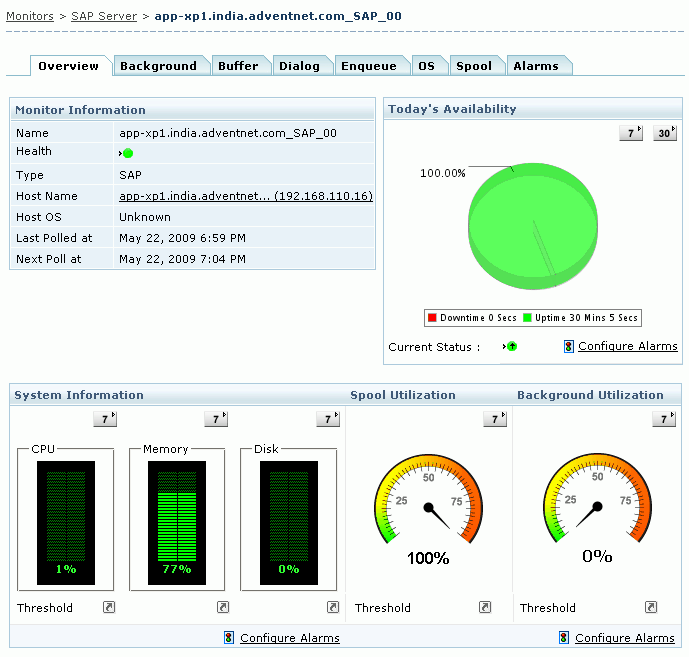
Step 3:
Click the Monitors->SAP Server link to reach the SAP monitor details section and view performance metrics.
Note: While creating a SAP monitor, you need a SAP user profile with the following authorization objects:
S_RFC
S_XMI_LOG
S_XMI_PROD
These are the minimum prerequisites for configuring a SAP server monitor in Applications Manager.
Step 1:
Click New Monitor drop-down menu and select SAP Server link under ERP category.
Step 2:
The 'Add Monitor' screen opens up. In this screen, specify the following details:
- Host Name / IP Address of the AS400/iSeries server.
- Subnet Mask of the server. If you have multiple system IP addresses configured with a single DNS name, select the ‘Do not resolve DNS name’ option under ‘Advanced’ section.
- SAP Logon client.
- SAP System number
- Language
- Polling Interval in minutes
- Username and Password for authentication.
- The Monitor Group with which you want to associate this monitor (optional)
Once you’ve entered the necessary information, click the Add Monitor(s) button. This action triggers discovery of SAP servers from the network and starts monitoring them.
Step 3:
Click the Monitors->SAP Server link to reach the SAP monitor details section and view performance metrics.
Note: While creating a SAP monitor, you need a SAP user profile with the following authorization objects:
S_RFC
S_XMI_LOG
S_XMI_PROD
These are the minimum prerequisites for configuring a SAP server monitor in Applications Manager.