How companies can implement Internet fair use policy for corporate users?
Internet fair use policy or acceptable use policy defines the appropriate Internet usage behavior expected from employees in their workplace. The policy aims to protect the employees as well as the companies IT infrastructure from malicious threats, inappropriate content, and corporate bandwidth draining web applications, all of which ultimately affects the productivity and competitiveness of the company as a whole.
To add tooth to the ‘written policy’ companies should have tools in place to enforce the policy in letter and in spirit. Companies use non-intrusive and real-time network security monitoring software’s like ManageEngine Firewall Analyzer to implement the Internet fair use policy in their corporate network.
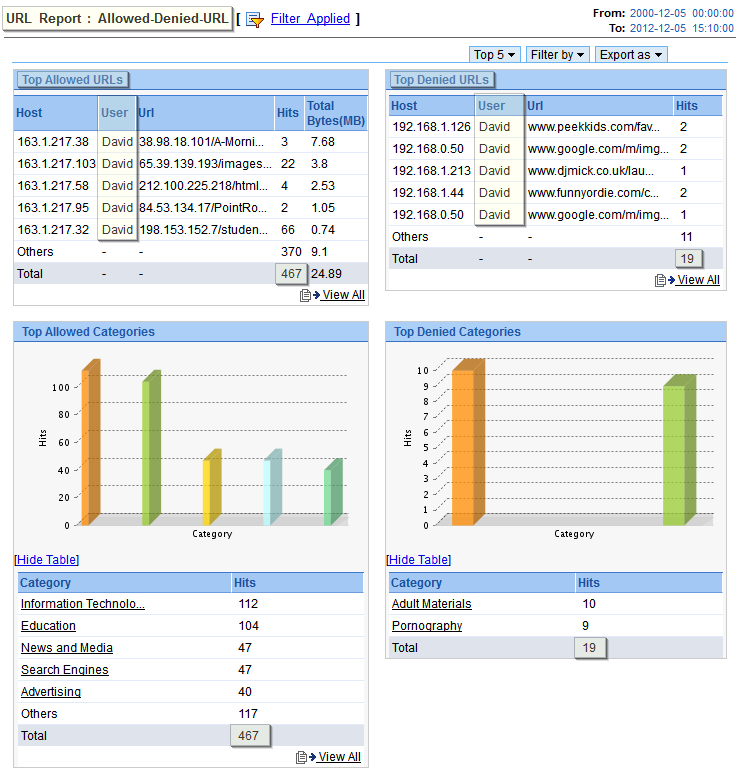
With ManageEngine Firewall Analyzer, you can get detailed reports on your corporate user’s internet usage and you can verify whether it is as per the allowed policy. The reports are:


- List of denied URLs and URL categories, each user tried to access
- List of allowed URLs and URL categories accessed by each user
- Sent, received and total Internet bandwidth consumed by each user
- Protocol based Internet usage of each user
- Separate report for each protocol

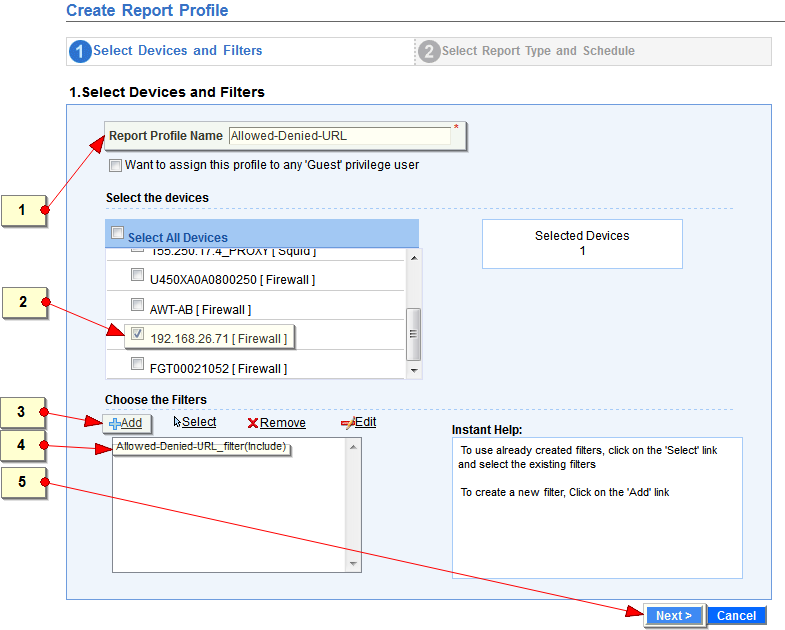
- Enter a name for this report profile. This field is mandatory.
- Select the devices as per your requirement.
- Choose any of the filters from the existing list, which meets the denied URL report condition.
- If there is no such filter available, add a filter. Use the ‘+ Add’ menu link.
- Navigate to the next wizard screen. Use the ‘Next’ button.
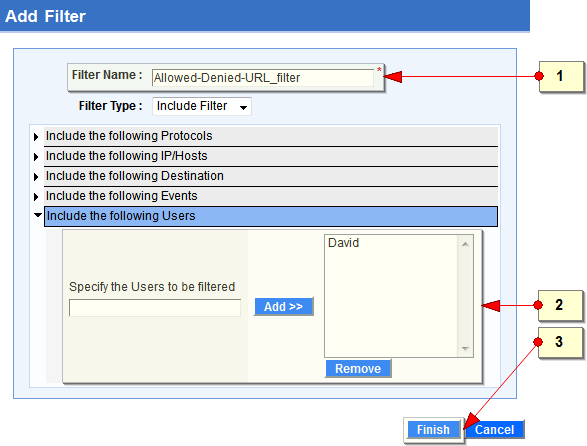
Add Report Filter

- Enter a name for this report filter. This field is mandatory. If filter name is not entered, by default ‘<Report Profile Name>_filter’ will be assigned as filter name. Select the filter type as required.
- Select ‘Include the following Users’ option and enter the user name in the text box. Use the ‘Add >>’ button to add the users for whom report should be filtered. Remove the user using ‘Remove’ button.
- Use the ‘Finish’ button to complete the report filter creation.

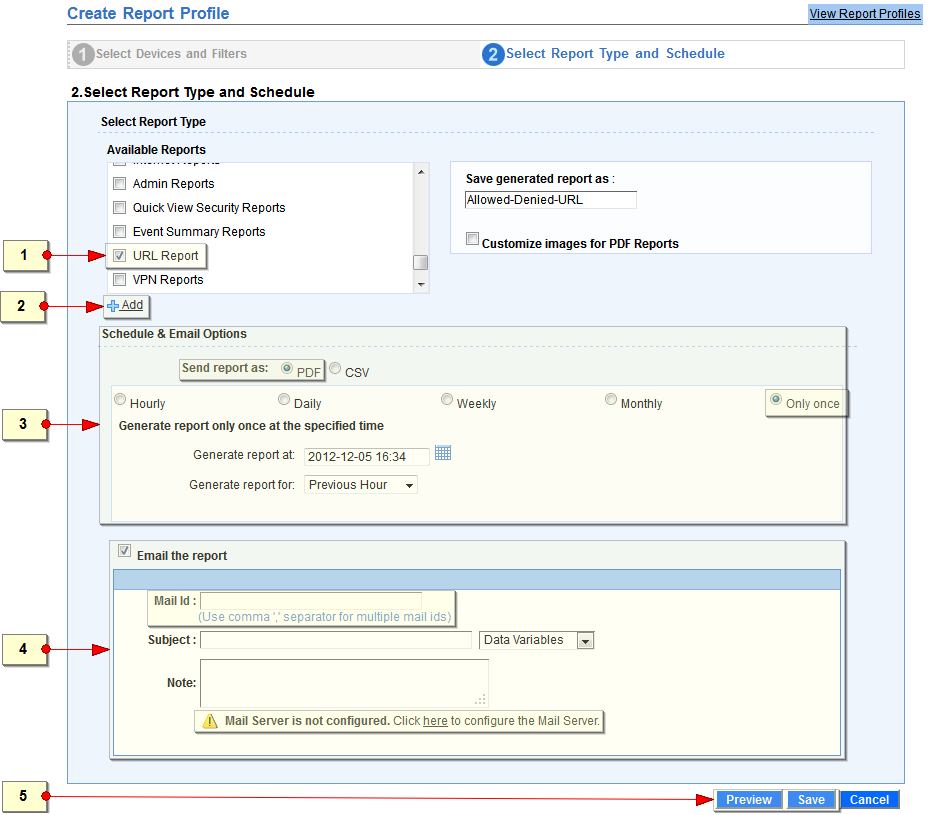
- Scroll down and choose the ‘URL Report’ from the ‘Available Reports’ list, which meets the denied URL report condition.
- Optionally, if you want to modify the definition of the report type, use the ‘+ Add’ menu link.
- Optionally, you can schedule the report generation, by default it is generated only once
- The report can be emailed to the concerned Administrator if you enable the ‘Email the report’ option and configure the ‘Mail Server’ and recipients email IDs.
- Use the ‘Preview’ button to have the report preview and Use the ‘Save’ button to save the report profile.
 Note that this report captures the accessed URLs and denied URLs attempted by one specific user. To get report for multiple users, use the 'Advance Search' option.
In our subsequent posts we will cover few of the other methods of implementing Internet fair use policy using Firewall Analyzer.
