Configuring the HighPerf Reporting Engine: Part 1
In continuation of our introduction blog on the HighPerf Reporting Engine, this blog discusses how to install the HighPerf Reporting Engine and integrate it with NetFlow Analyzer.
The HighPerf Reporting Engine comes as an add-on to NetFlow Analyzer. It can be installed on the same machine where NetFlow Analyzer is installed or on a remote server. Since the HighPerf Reporting Engine is installed on the same machine, select the Localhost option and specify the server's Administrative username and password for Windows, and the root user's credentials for Linux. Click Save.
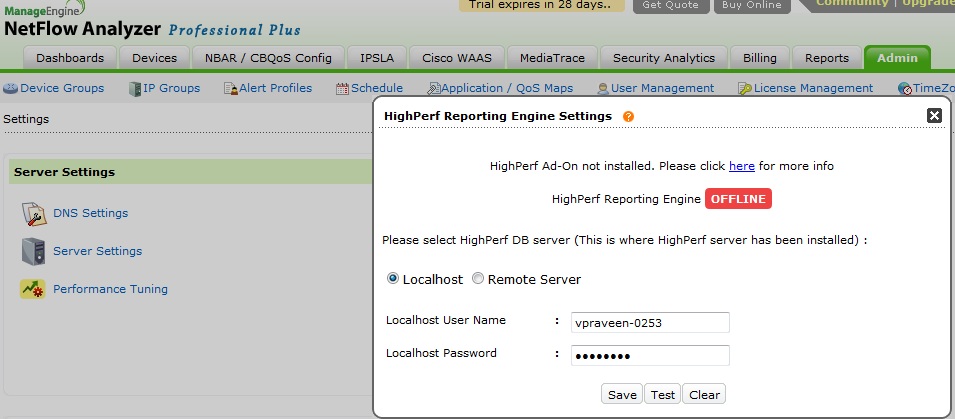 Once the connection is established, you can see the HighPerf Reporting Engine is online and raw data can now be set to six months under Admin > Raw Data Settings.
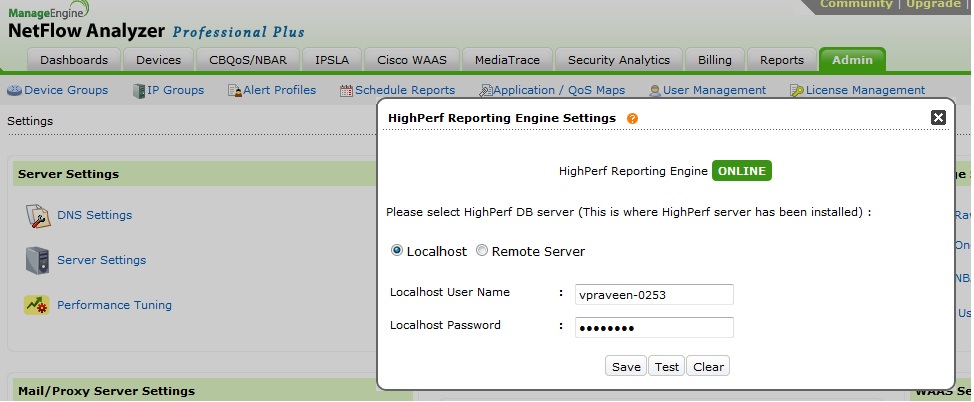
 After successful installation, start the service named Vectorwise and Vectorwise Remote Manager on the remote server.
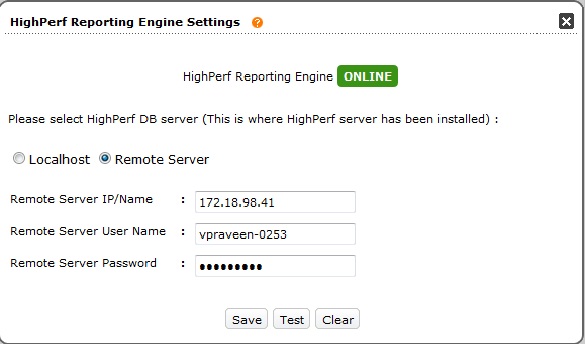 Once the connection is saved, the raw data is store in the remote server. We will go through Linux installation in our next blog.
Installing the HighPerf Reporting Engine and NetFlow Analyzer on the same server
If you prefer to install the HighPerf Reporting Engine add-on on the same server where you are going to deploy NetFlow Analyzer, you can download the installable for Windows here and for Linux here.Installation guide for Windows | Installation guide for LinuxIntegrating the HighPerf Reporting Engine with NetFlow Analyzer
Once the installation is completed and NetFlow Analyzer is started on Windows or Linux, connect to the user interface and click Admin > HighPerf Reporting Engine.Since the HighPerf Reporting Engine is installed on the same machine, select the Localhost option and specify the server's Administrative username and password for Windows, and the root user's credentials for Linux. Click Save.Once the connection is established, you can see the HighPerf Reporting Engine is online and raw data can now be set to six months under Admin > Raw Data Settings.Deploying the HighPerf Reporting Engine on a separate server
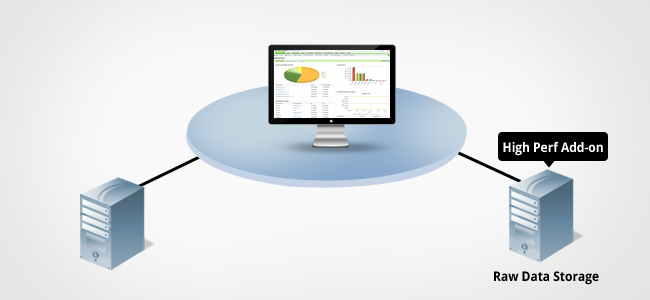
Once you install NetFlow Analyzer 9.8 (build 9800) and are planning to deploy the HighPerf Reporting Engine on a dedicated server, this involves two steps:- Install the HighPerf Reporting Engine client on the NetFlow Analyzer server.
- Install the HighPerf Reporting Engine database server on a dedicated machine.
Installing the client on the NetFlow Analyzer server
Windows
- Download the HighPerf Reporting Engine add-on for Windows here. Double-click the Installation file and run it.
- Read the license terms and conditions, and choose I accept the terms of the agreement. Click Next to continue with the installation.
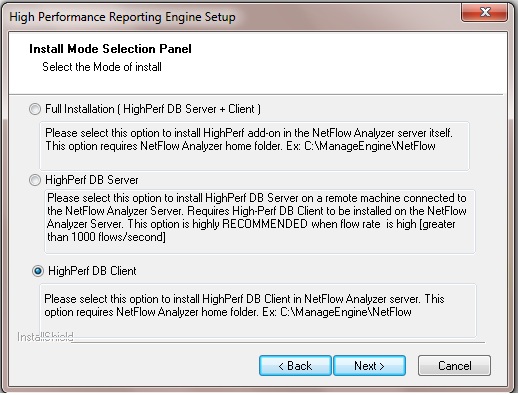
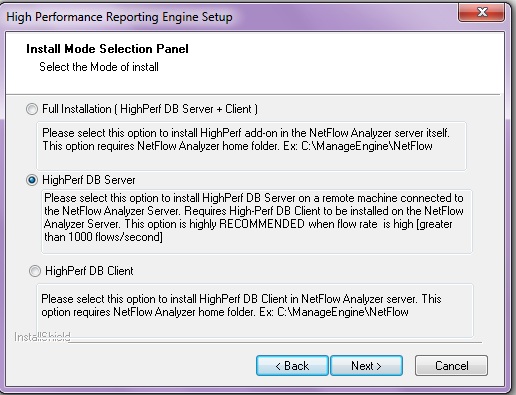
- The next screen asks whether you are going to proceed with the full installation or with installation of the client or database. Install the HighPerf Reporting Engine add-on client on the NetFlow Analyzer server; this is done to establish a connection with the remote HighPerf database server.
Installing the database server on a remote server
- Download the HighPerf Reporting Engine add-on for Windows here. Double-click the installation file and run it.
- Read the license terms and conditions, and choose I accept the terms of the agreement. Click Next to continue with the installation.
- The next screen asks whether you are going to proceed with the full installation or installation of the client or database server. Select the HighPerf DB Server option and proceed with the installation.
After successful installation, start the service named Vectorwise and Vectorwise Remote Manager on the remote server.Integrating the HighPerf database server with NetFlow Analyzer
Connect to the user interface and click Admin > HighPerf Reporting Engine. Select the Remote Server option and specify the remote database server IP and that server's username and password to establish a connection.Once the connection is saved, the raw data is store in the remote server. We will go through Linux installation in our next blog.
[...] previous blog gave you detailed information on installing the HighPerf Reporting Engine in Windows [...]
[...] previous blog gave you detailed information on installing the HighPerf Reporting Engine in Windows [...]